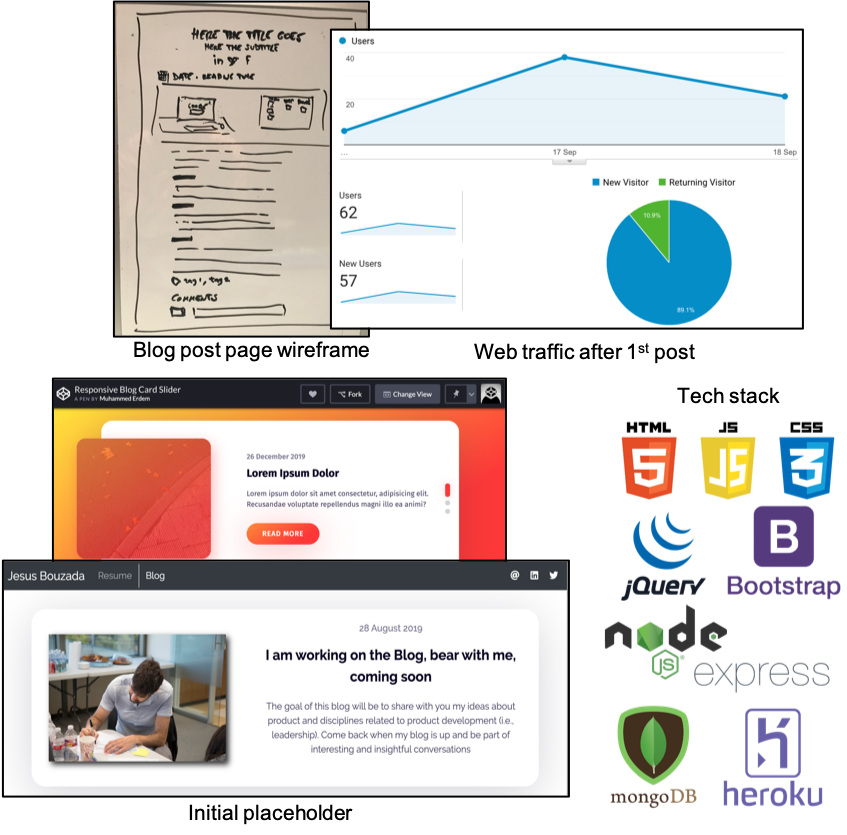
The issue on hand here was that I needed to scale my website fairly quickly in a secure and maintainable way. Why? Content is king for a website. Read on to learn what I did to solve that problem.
Static vs dynamic website
Here I had my website, fed by hardcoded data, and the question was whether to leave it like a static website or make it dynamic. Before I answer this question, let me step back and introduce a few concepts. You are probably familiar with these concepts, feel free to skip the next paragraph.
Static website, dynamic website... what am I talking about? Static websites require developers to change the frontend code for anything new to show. Yet, static does not mean that it will not respond to user actions, just that it cannot be manipulated on the server or interact with databases (i.e., backend). On the flip side, dynamic websites are not prebuilt but built upon users' requests. What are the frontend and backend? If we used a restaurant analogy, the backend is everything that happens in the kitchen; the frontend is what is plated and sent to your table. Static websites are coded in HTML, CSS, and javascript (i.e., frontend), which provide structure, style, and logic (skeleton, skin, and flesh for a more creepy description). A lot more stuff happens in the kitchen (see the picture below).

To answer the question of static vs dynamic, I needed to weigh the pros and cons against my goals. In a nutshell, static websites are faster to load and easier to develop at first, while dynamic websites are more scalable and flexible once you put all the pieces together. Since my goal was to build a blog, I needed a website that I could easily scale with more content. For this kind of simple website, the load speed didn't seem to be a problem. Once the cards were on the table, the decision was practically made for me.
Learn more about static and dynamic websites here.
The path to decide the final solution
I'd decided to build a dynamic website, but that wasn't the end of the story. There are a lot of options inside the kitchen , a lot of questions to answer. How would I overcome the disadvantages of making a dynamic web? What tech stack would I use? How would I deal with security?
The problem with dynamic websites is that it takes longer to build the website at first, and I wanted to have my website up there as soon as possible. To go around that, I took a hybrid approach. First, I built the MVP as a static website and, then, I made it dynamic.
What about the tech stack? Well, most decisions were already made by the time I built the static website (more on this on a later post). The one decision I needed to make here was how to store data.
I could do that in plain files or a database. What is the difference? you may ask. While both are collections of information, a database provides an interface for interacting with that data. Furthermore, databases could be SQL (i.e., relational) or NoSQL (i.e., non-relational). SQL databases are tabular and flat, so you have to define the tables ahead of time (not very flexible). They have been around the longest. On the other hand, NoSQL databases have no tables, and things can be nested. You don't have to define the tables ahead of time (more flexible). They store data in BSON format, which is similar to how javascript objects look (i.e., JSON). Too much information, right.

I chose mongoDB for a number of reasons. To begin with, mongoDB is a NoSQL database, so it is very flexible and dynamic. While these characteristics don't make NoSQL better or worse than SQL, they are characteristics I was looking for. But that is not really the main reason. To be honest with you, the staff I was doing was doable in any of the databases I could pick from. The main reason I decided on mongo is that it is the most popular database right now used with node and express, which is technology I was already using in my web. Together with Angular, they form the popular MEAN stack (my website uses the MEN stack for now ).
Now, how to manage the database. This is a make-or-buy decision. That is: to make my app or to use one of the GUI tools available. At work, I face this dilemma from time to time. My first thought: "why to reinvent the wheel?" This time was different, though. While using an existing tool would have saved me some time, I chose to build my app. For one, I needed only limited features. For two, I wanted to tailor the workflow and the design so it served as a staging area. And I could have just extended my website with an area to manage the database. However, that would have required to implement a secure area on the web. I wanted something simpler. I decided to do a local app to avoid worrying about security (thoughts? let me know).
RESTful Routing
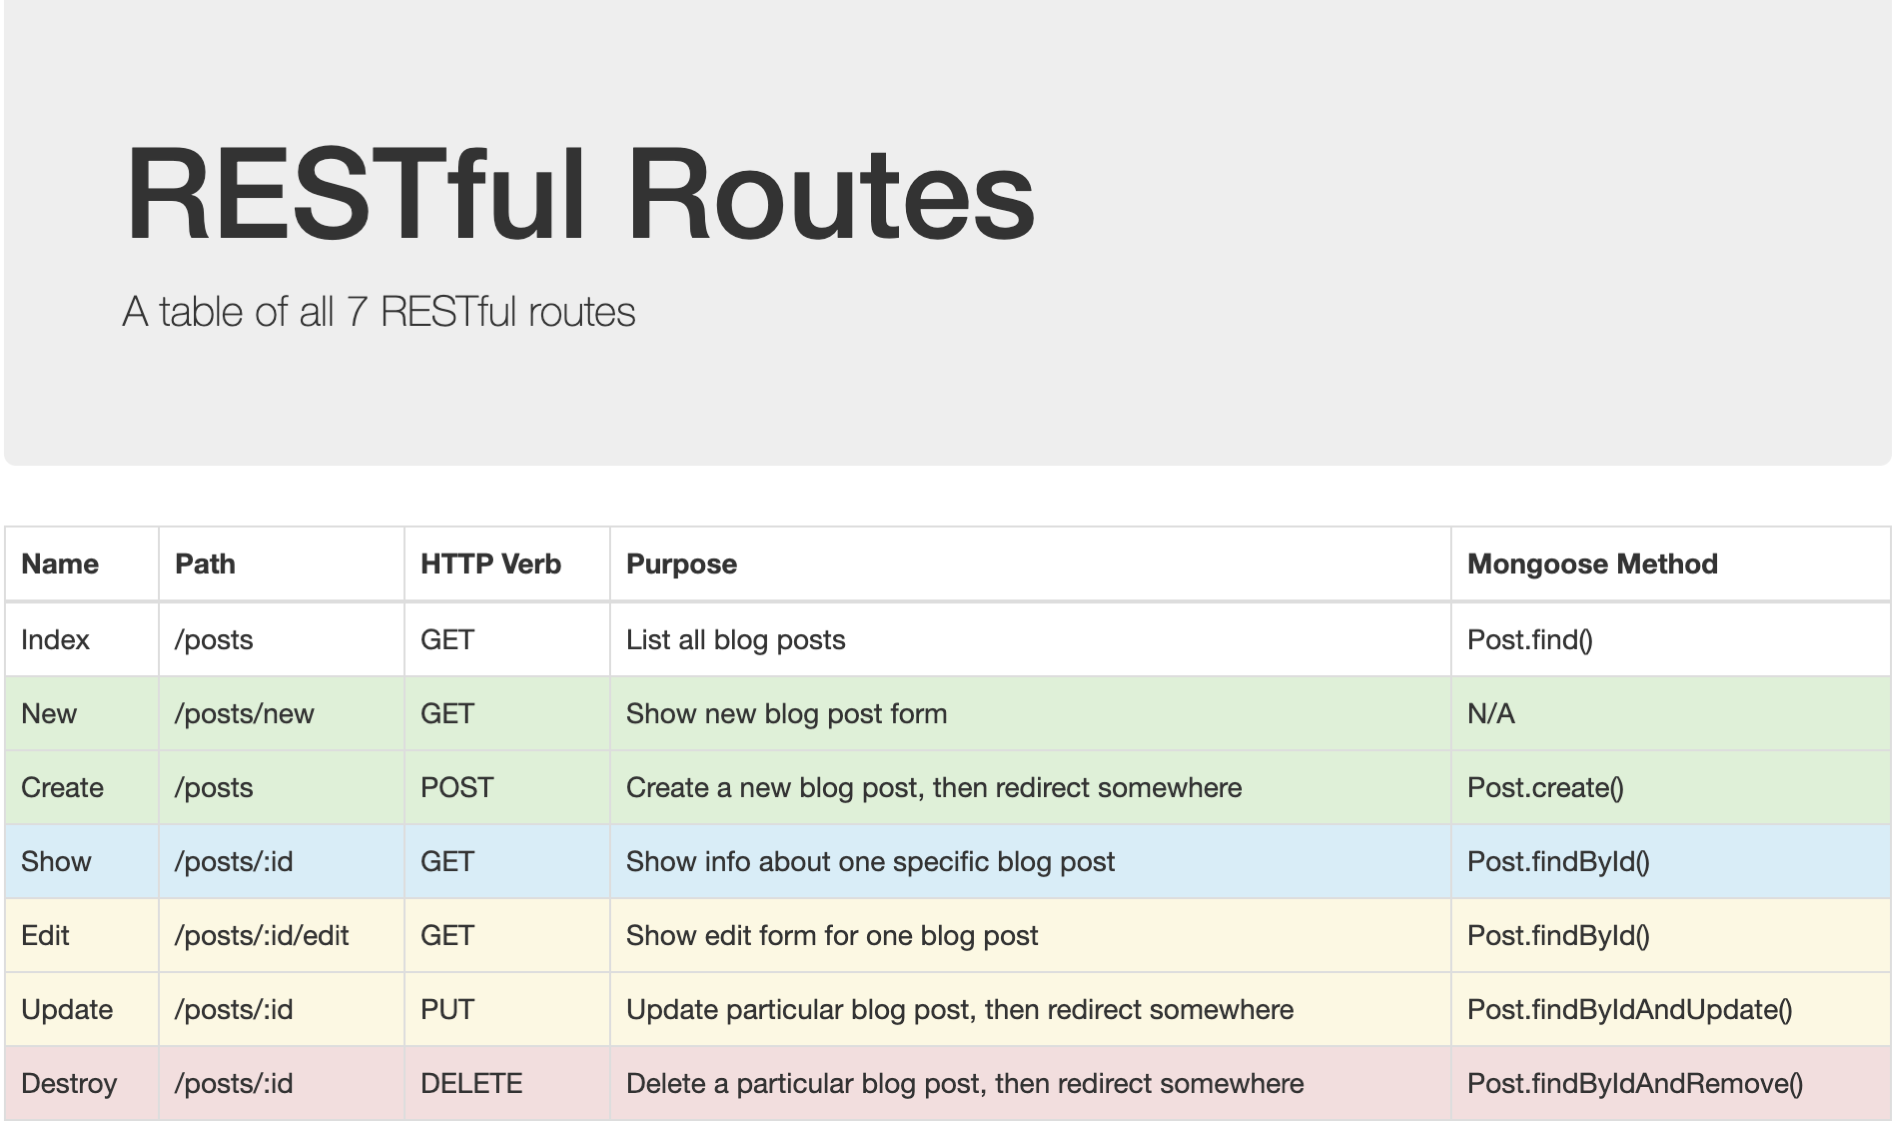
For those who don't know, REST is simply a pattern for defining routes. It's a way of mapping HTTP routes and CRUD together (Create, Read, Update, and Delete). I wanted the app to be able to read all blog posts, add a new blog post, edit an existing blog post, and delete a blog post. For all of that, I needed routes, seven of them. Seven for four operations? Yes, we need two routes to create and edit: one to show the form and another to perform the operation. The RESTful pattern follows a convention (see the table below). The pattern restricts the ways that the server can process and respond to client requests. In turn, these restrictions improve performance, scalability, simplicity, modifiability, visibility, portability, and reliability. Pretty neat, right!? Using this pattern was a no-brainer.
One route at a time
It's never a good practice to build many features onto a product at once. You better build it incrementally. That is what I did. The sensible thing to do here was to implement one route at a time.
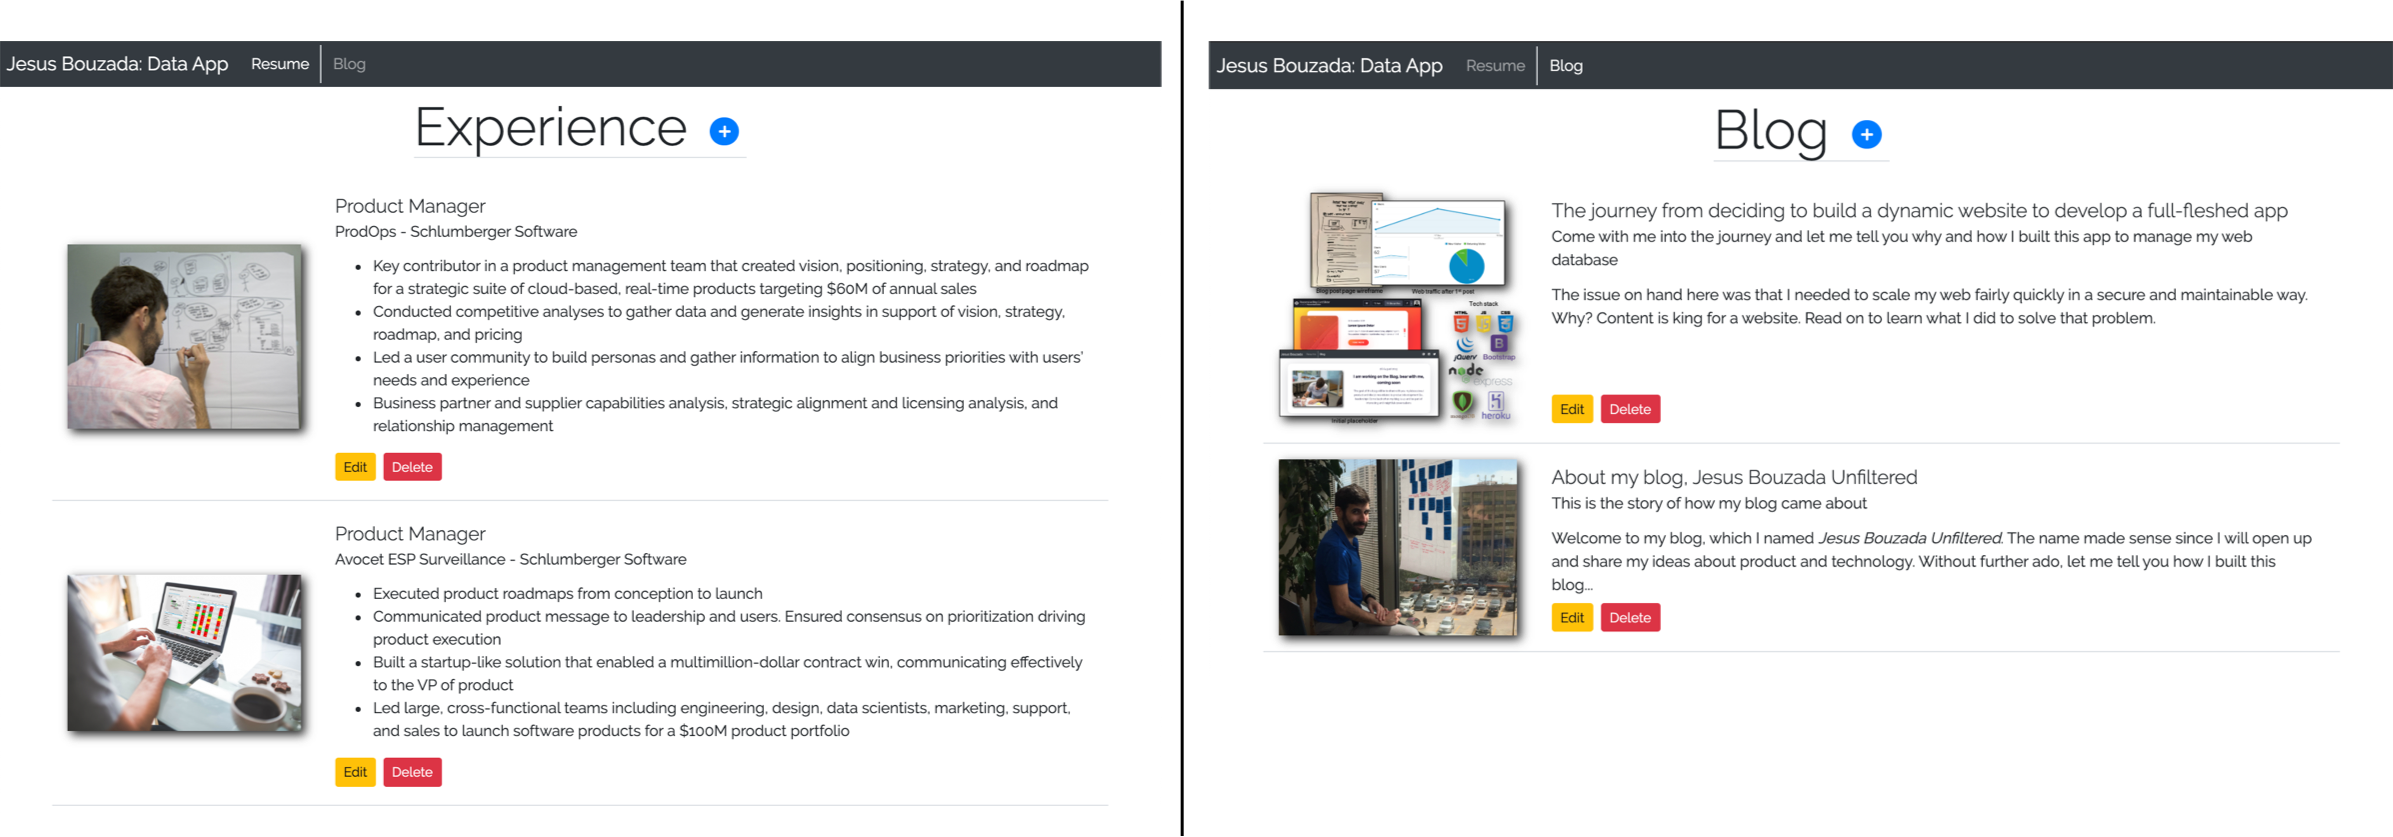
I started with the read route. Wait a moment, there is nothing to read! Right. So I had to seed the database first. This route was not only showing the blog posts but all the pages. My database store pages, a concept I defined to store my experience, education, showcase examples, and blog posts. There was more than just showing the pages in this first increment. I had to create the structure - routes, views, public files... - and the design paradigm of the app. I wanted a simple but attractive design. Bootstrap helps to quickly put together a nice design. The remaining work seemed much more reachable by the end of this first iteration.
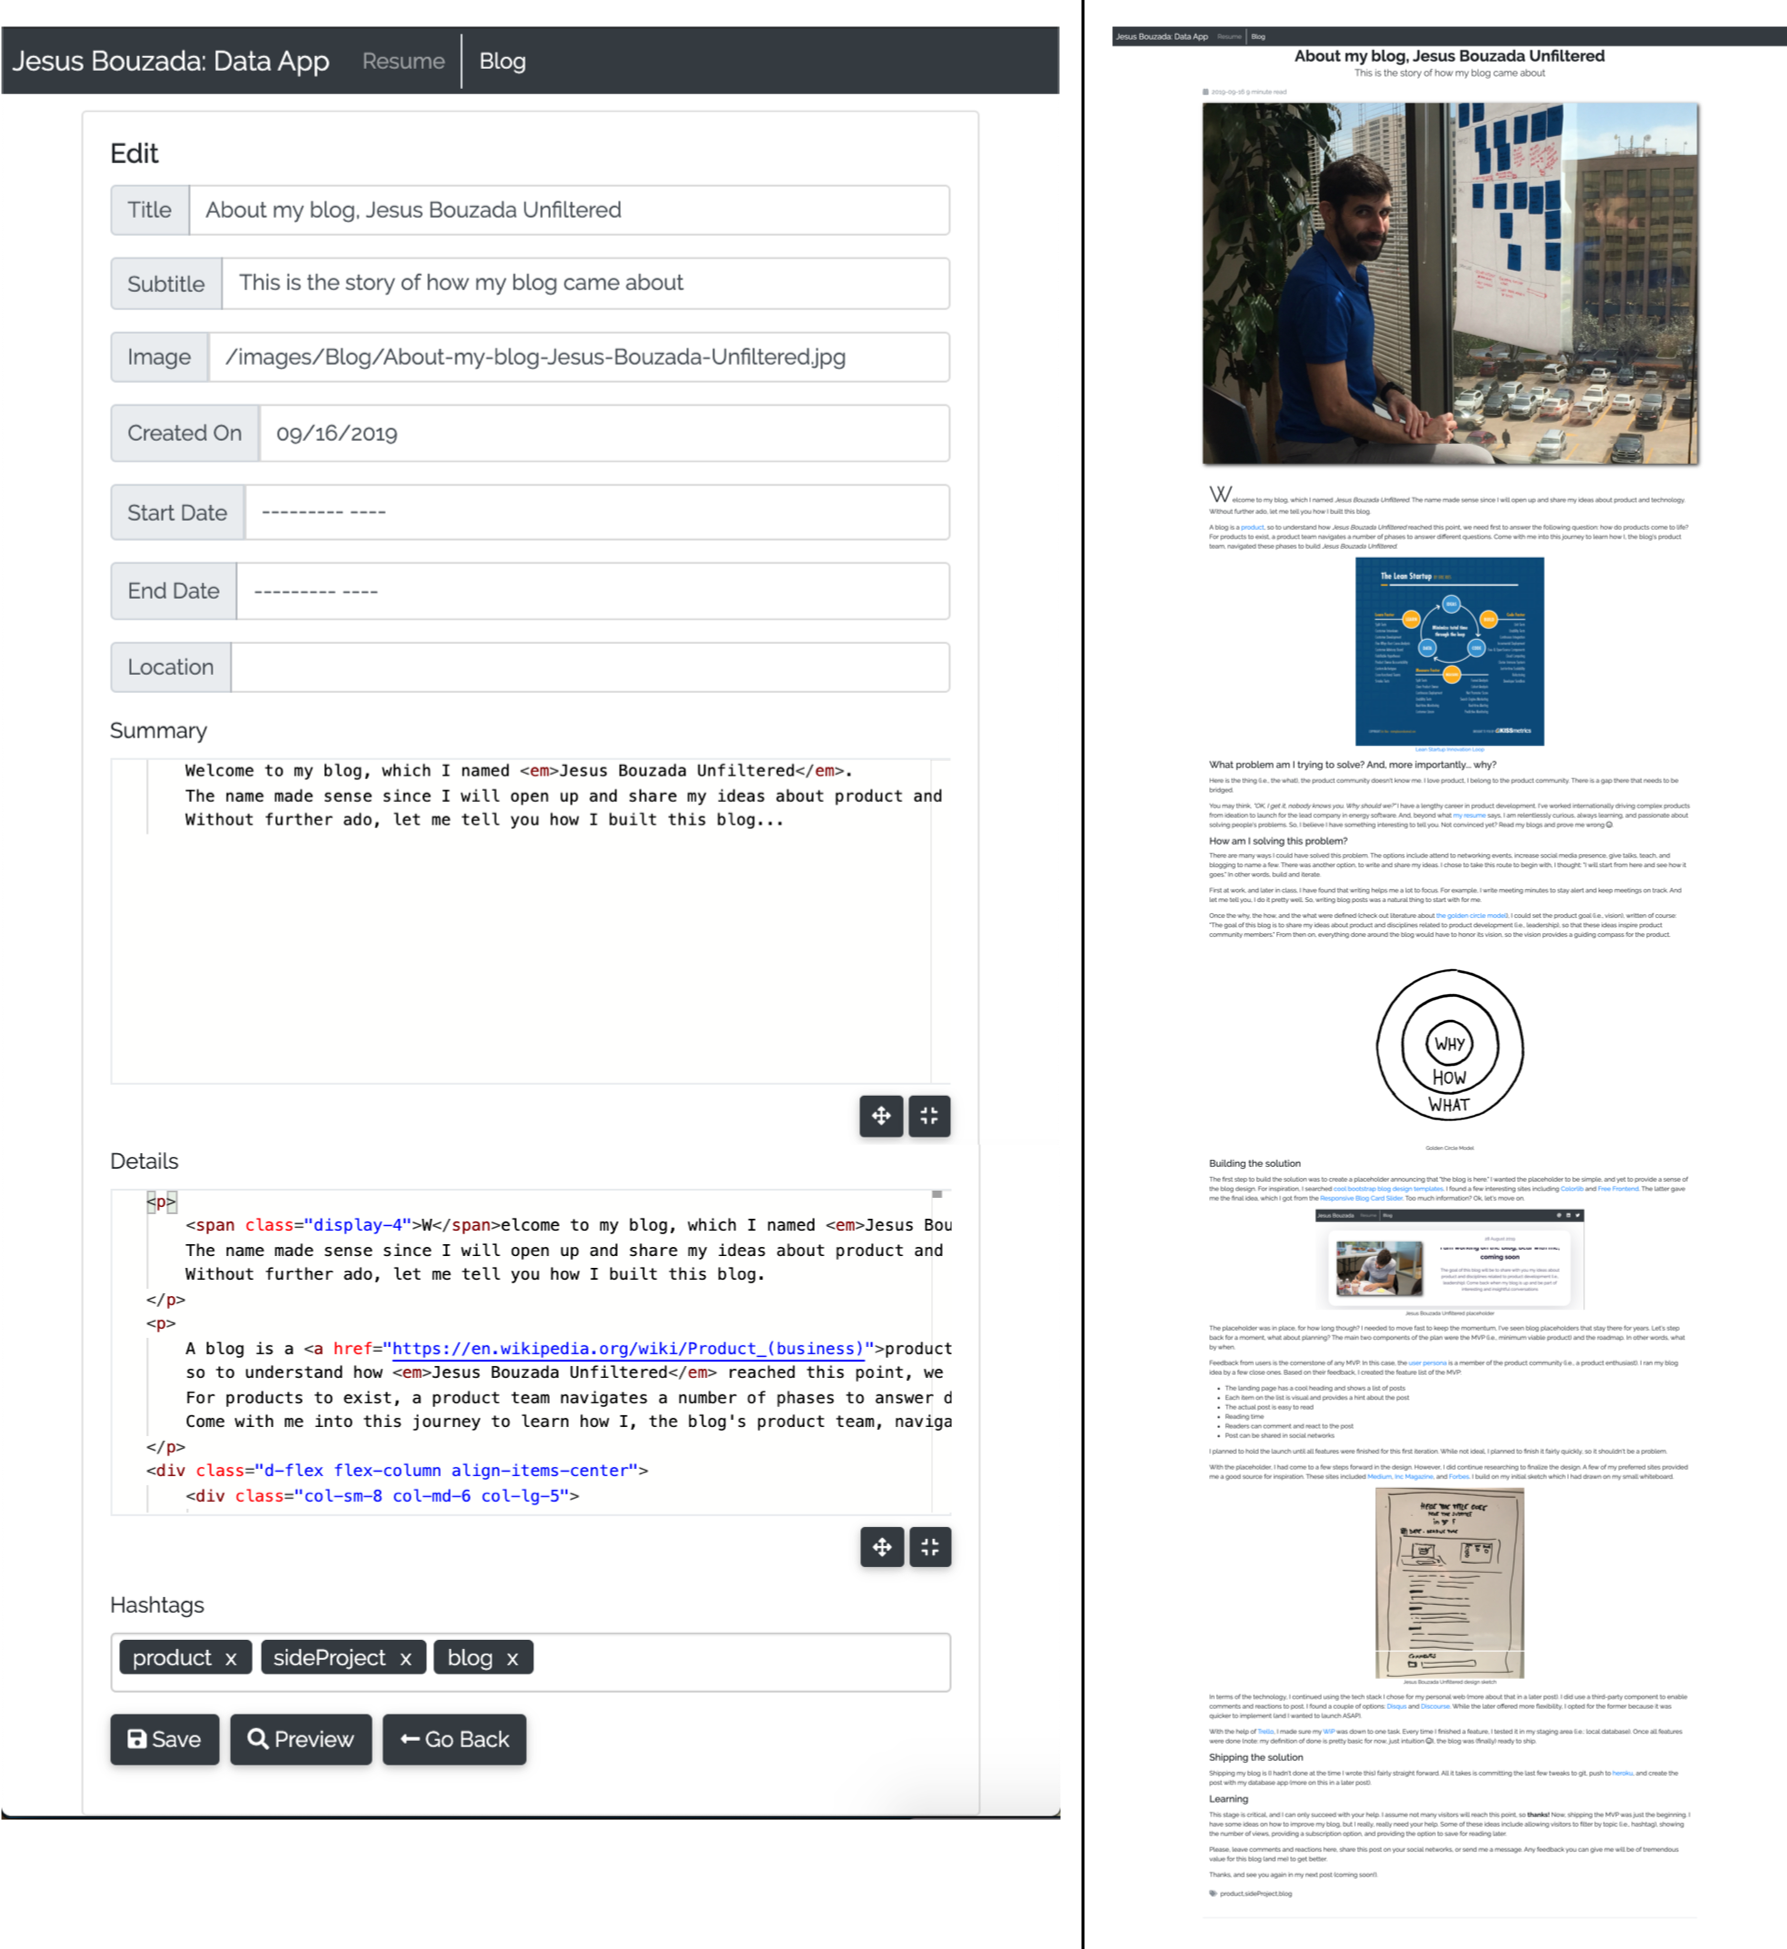
The next two iterations aimed to deliver create and edit features. A couple of cool components I used in the form were Bootstrap Tags Input and monaco editor. By using input tags, my goal was to be able to easily add and remove hashtags. The typeahead library allows making hashtags suggestions while typing. In my app, hashtags from other pages are suggested to avoid duplication due to different spelling. I chose the monaco editor among other options including textarea, Trix, Quill, and Summernote. The reason was that I wanted a rich text editor that highlighted HTML syntax, and the monaco editor powers visual studio code, my preferred code editor. This editor, especially when used in fullscreen, makes it much easier for me to type the HTML code that is pulled out of my database to generate the pages of my website dynamically. To check the result of this code, I added a preview option that would show me the blog post exactly as on the website.
In the last iteration, I delivered the last route, the delete route. With that, I completed the MVP of the "jesusbouzada.com data app".
Staging before airing
I run the app locally in two different modes. I run it on debug mode when testing development work (i.e., enhancements or bug fixes), writing new pages, or editing existing pages. The debug mode allows me to stage my writing. This is really important, I would not want to write half a post and make it available undone to my website visitors. I run the app in release mode when I want to submit completed pages to my website.
Write on!
Upon the completion of the MVP, the lights turned green to unleash the writing power I have been holding on for a long time. My first blog post, "About my blog, Jesus Bouzada Unfiltered", marked the grand debut of my blog. This post you are reading is the second chapter.
I hope you are enjoying reading my posts. I would really benefit from any feedback or advice you could give me. For that, please, leave comments and reactions here, share my posts on your social networks, or send me a message.
Thanks, and see you again in my next post (coming soon!).
A little teaser
Oh! before I let you go, I got some feedback after my previous post. I was told to finish posts with a connection to the following post (the one in the oven). So here I go...
Don't miss my next post! It will close the circle about this story of how I built jesusbouzada.com.
I'll be waiting for you!